Practical Tips for EPSON Printhead Calibration
EPSON Printhead Calibration is crucial for optimizing print quality on the EPSON L41 series all-in-one printer. Despite the EPSON printer’s commendable performance, some users may experience intermittent entries into the printer mode. This article aims to highlight the significance of EPSON Printhead Calibration as a remedy for enhancing print quality, ensuring a clearer and higher-quality printing experience with every use.
EPSON Printhead Calibration
Calibration becomes imperative when the printed text resembles the fuzzy output one might associate with a graphics card lacking proper drivers. The calibration process can work wonders, particularly when issues stem from settings, such as flashing an English firmware on the printer.
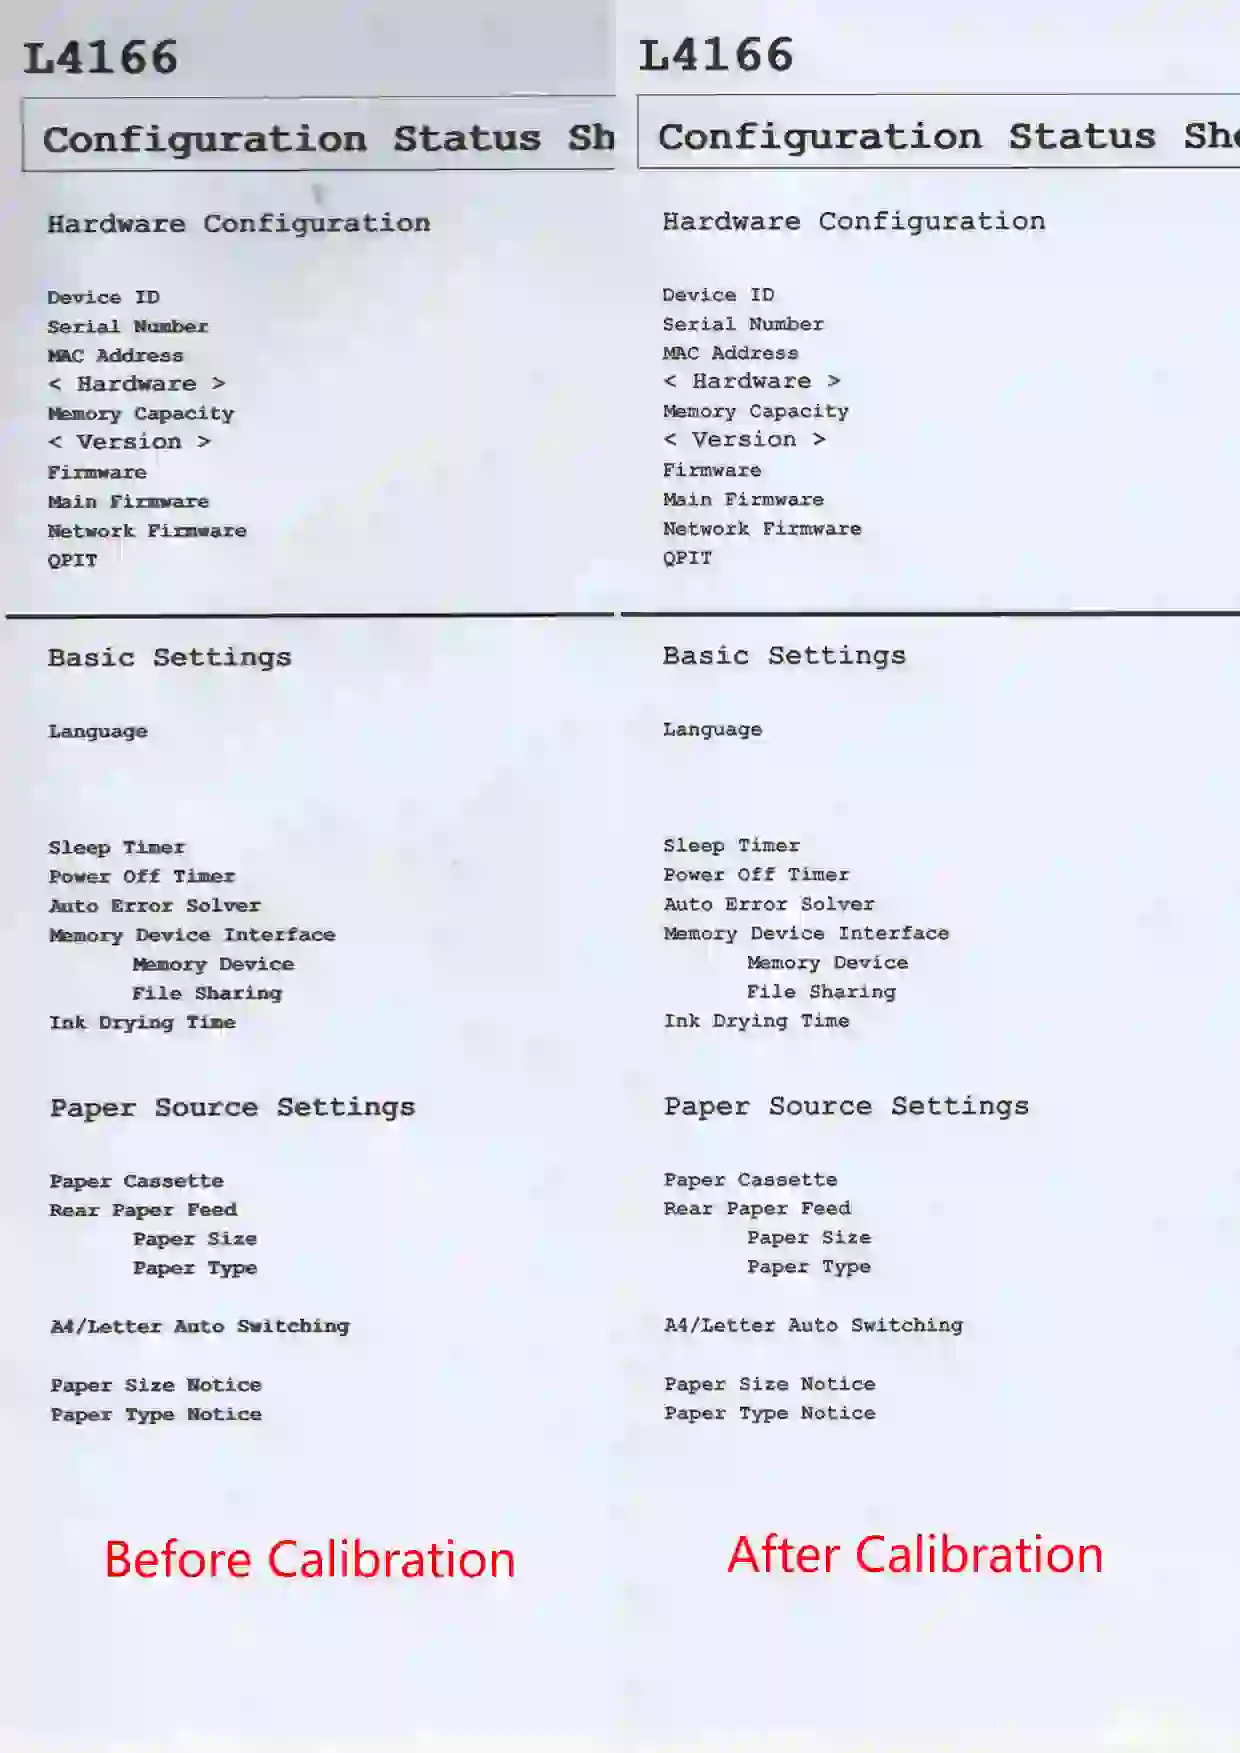
Let’s delve into a comparative analysis through a scanned result. A discerning eye would notice the left image’s blurrier quality upon close examination, underscoring the necessity of calibration.
Initiating the Calibration Process
To embark on the calibration journey, navigate to the printer’s control panel and select the maintenance menu. Within this menu, you’ll find options for both horizontal and vertical calibration. However, it’s crucial to clarify that triggering calibration once doesn’t necessarily translate into an immediate fix. Calibration is an iterative process, demanding patience and understanding from users.
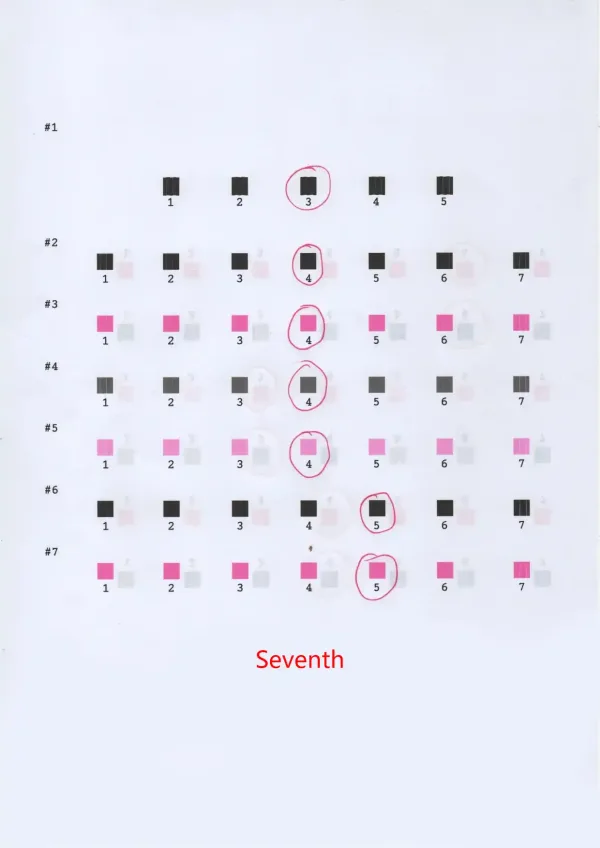
Understanding the Calibration Process
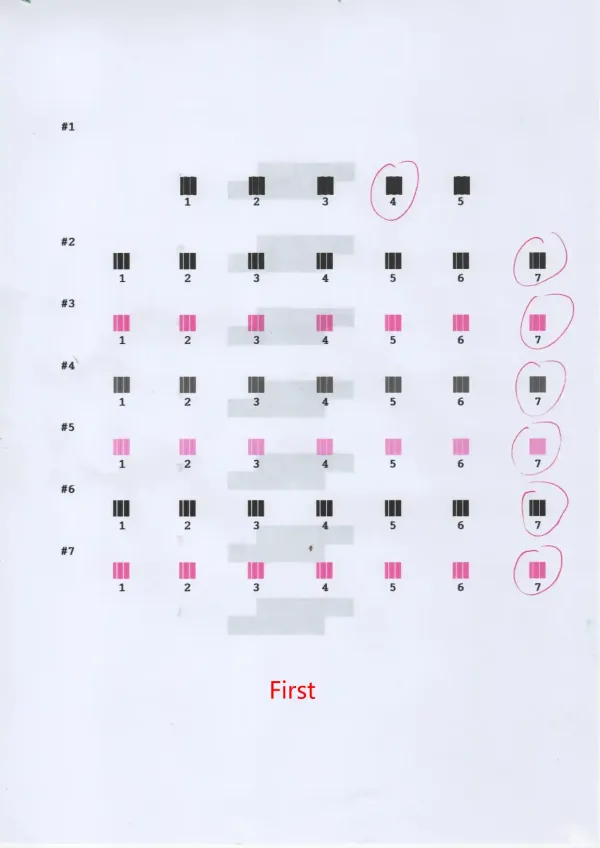
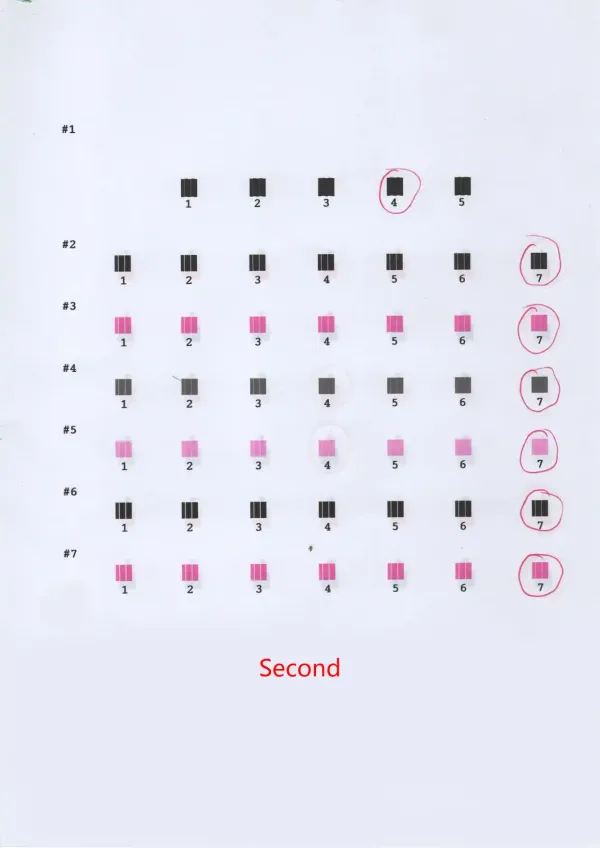
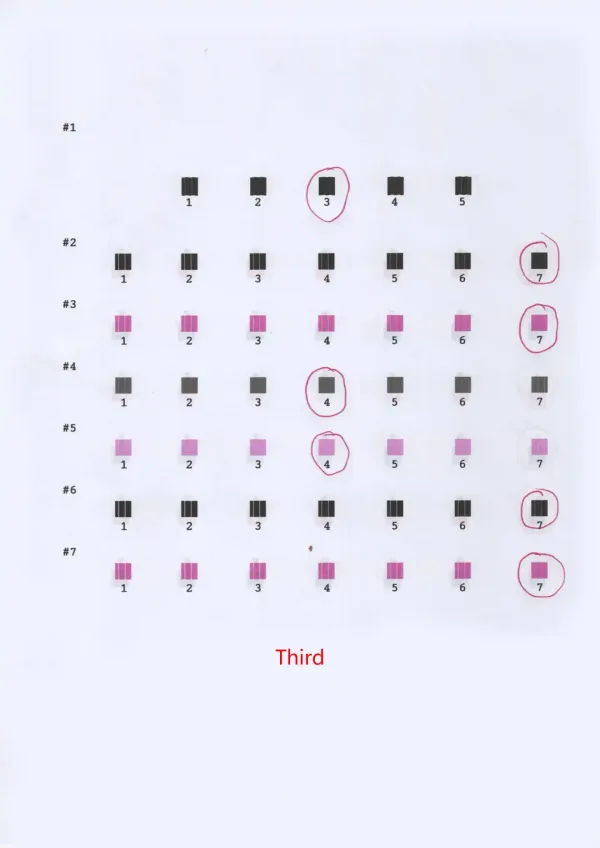
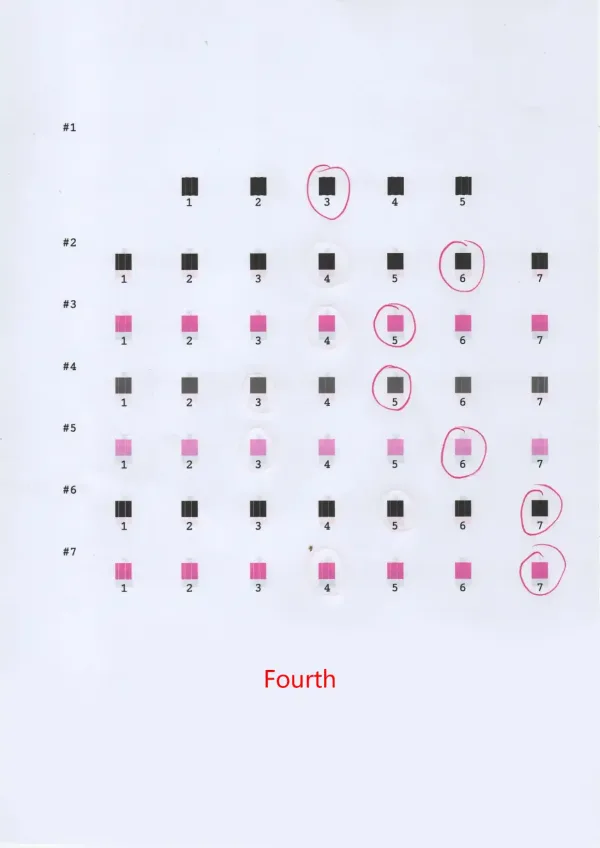
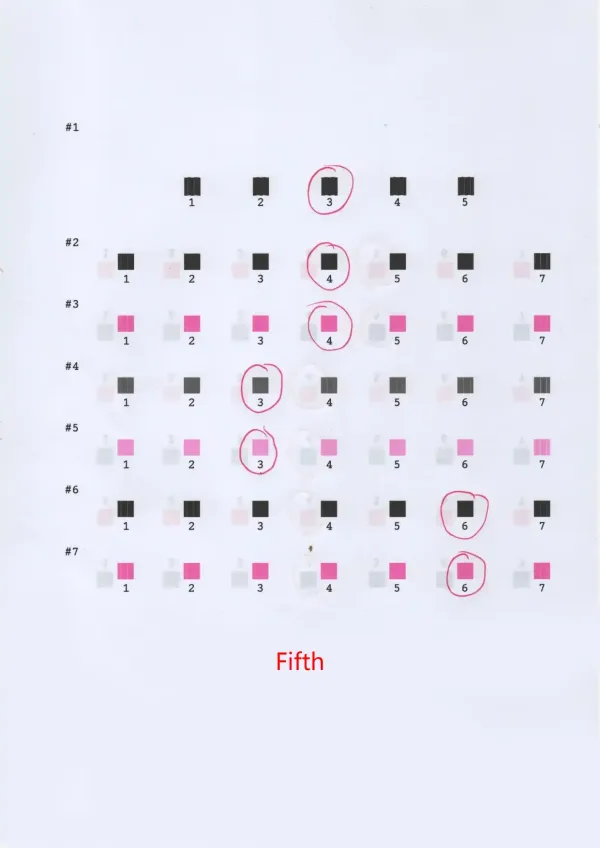
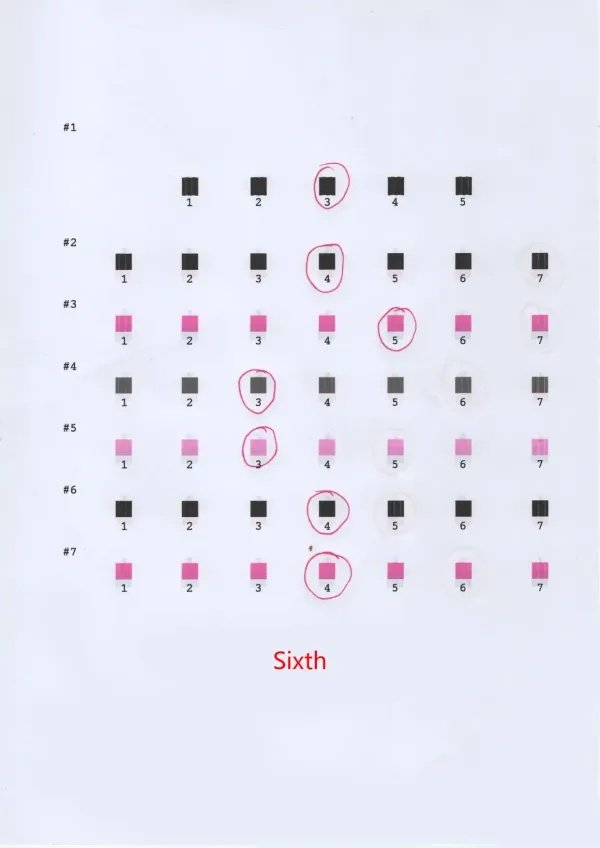
Focusing on horizontal calibration, each calibration attempt prompts the printer to eject a sheet adorned with small blocks. The user’s role is to meticulously select the block with the optimal print quality, thereby providing valuable feedback to the printer. This feedback becomes the foundation for the printer to make nuanced adjustments. However, due to the incremental nature of these adjustments, multiple calibration attempts might be necessary. With each successive attempt, the printer fine-tunes its precision, resulting in a gradual improvement in print quality.
Deciphering a Good Block
An ideal block, in the context of calibration, exhibits no gaps or overlaps. This means a block without any white seams or intersections, signifying a seamless and accurately calibrated print.
Choosing the Best Among Imperfect Options
In scenarios where no ideal block is present, opt for the block within a row that displays minimal gaps and overlaps. These blocks are usually found along the edges and are your best bet for achieving satisfactory calibration.
Below, I’ve meticulously documented my calibration process over seven attempts, providing a visual representation of the printer’s progressive adjustments, culminating in near-perfection by the final attempt.
Technical Support
While the outlined calibration method typically resolves EPSON printers entering printer mode, persistent issues warrant further action. In such cases, contacting EPSON’s official support or consulting Sunavin’s adept technical engineers is recommended. Sunavin, as one of China’s leading printer suppliers, is committed to providing professional assistance to ensure user satisfaction.
To explore a comprehensive range of printer accessories, users are encouraged to peruse Sunavin’s detailed product catalog on our website. We pledge to deliver top-quality printing products at competitive prices, making us your reliable partner in the world of printing solutions. Click to contact us.